DIY lighting projects can transform any space with creativity and personal flair. They offer a budget-friendly way to enhance your home.
Lighting plays a crucial role in setting the mood and functionality of a space. DIY lighting projects provide the opportunity to customize and personalize your home’s ambiance. From repurposing old items to creating new fixtures, the possibilities are endless. These projects can be simple or complex, depending on your skill level and creativity.
Materials like string lights, mason jars, and LED strips can be used in innovative ways. With a little effort, you can achieve professional-looking results. DIY lighting not only adds aesthetic value but also serves as a fun and rewarding hobby.
Introduction To Diy Lighting
DIY lighting projects can transform your home. You can use simple materials to create stunning light fixtures. This helps add a personal touch to your living space. DIY lighting is cost-effective and fun. It allows you to explore your creativity. Let’s dive into the world of DIY lighting.
Benefits Of Diy Lighting
DIY lighting offers many benefits. Here are some key advantages:
- Cost-Effective: Save money by making your own lights.
- Customization: Tailor your lighting to fit your style.
- Eco-Friendly: Reuse old materials to create new lights.
- Educational: Learn new skills while making something beautiful.
Choosing The Right Materials
Picking the right materials is crucial. Here are some tips:
- Budget: Choose materials that fit your budget.
- Durability: Ensure the materials are long-lasting.
- Safety: Use safe and fire-resistant materials.
- Availability: Opt for materials you can easily find.
Here is a simple table to help you choose:
| Material | Pros | Cons |
|---|---|---|
| Wood | Natural, Warm | Can catch fire |
| Metal | Durable, Modern | Can be heavy |
| Plastic | Lightweight, Cheap | Less durable |
With the right materials, your DIY lighting project will be a success. Get creative and enjoy the process!
Essential Tools And Supplies
Before starting any DIY lighting project, gather all necessary tools and supplies. Having the right materials ensures a smooth and enjoyable experience. This section will guide you through the essentials.
Must-have Tools
These tools are crucial for your DIY lighting projects:
- Screwdriver Set: Essential for assembling and disassembling parts.
- Wire Cutters: Needed for cutting and stripping wires.
- Measuring Tape: Ensures accurate measurements for your lights.
- Drill: Useful for making holes in walls or ceilings.
- Multimeter: Checks electrical connections for safety.
- Hot Glue Gun: Helps secure components in place.
Materials Checklist
Make sure you have these materials before starting:
- Light Bulbs: Choose the correct type for your project.
- Wires: Necessary for connecting electrical components.
- Switches: Used to control the lights.
- Battery Packs: Power source for portable lights.
- Light Fixtures: Holds the bulbs and adds style.
- Electrical Tape: Insulates and secures wire connections.
Here is a quick reference table for your convenience:
| Tool | Purpose |
|---|---|
| Screwdriver Set | Assembling parts |
| Wire Cutters | Cutting wires |
| Measuring Tape | Measuring distances |
| Drill | Making holes |
| Multimeter | Checking connections |
| Hot Glue Gun | Securing components |
Safety Tips
When working on DIY lighting projects, safety is the top priority. Understanding and following safety tips ensures your project is successful and risk-free. Below are essential safety guidelines to follow:
Electrical Safety
Electrical safety is crucial for any DIY lighting project. Below are some key points to ensure you stay safe:
- Turn off the power: Always turn off the power at the circuit breaker before starting.
- Use a voltage tester: Use a voltage tester to confirm the power is off.
- Check for damaged wires: Inspect wires for any damage or wear. Replace if needed.
- Avoid water: Never work with electrical components near water.
- Use proper insulation: Ensure all wires are properly insulated to prevent short circuits.
Proper Handling Of Tools
Using tools correctly is vital for your safety. Here are some tips for handling tools properly:
- Read the manual: Read the tool’s manual to understand its operation.
- Wear protective gear: Always wear gloves and safety glasses.
- Keep tools clean: Clean your tools after each use to ensure they function well.
- Store tools safely: Store tools in a secure place to prevent accidents.
- Use the right tool: Use the correct tool for each task to avoid damage or injury.
By following these safety tips, you can enjoy your DIY lighting projects without any risks.
Creating Pendant Lights
Transform any room with DIY pendant lights. They add style and a personal touch. These lights hang from the ceiling and brighten your space creatively. Follow this guide to create your own pendant lights at home.
Design Ideas
Choose a design that fits your style. Here are some creative ideas:
- Industrial Style: Use metal pipes and Edison bulbs.
- Bohemian Look: Opt for woven baskets as shades.
- Modern Touch: Use geometric shapes and bright colors.
- Vintage Charm: Repurpose old jars or bottles.
Step-by-step Guide
Follow these steps to create your pendant light:
- Gather Materials: Light kit, shade, screws, and tools.
- Prepare the Shade: Drill a hole if needed.
- Attach the Light Kit: Screw the light kit into the shade.
- Wire the Light: Follow the instructions carefully.
- Install the Pendant: Secure it to the ceiling.
Here’s a simple table to help you with the materials:
| Material | Purpose |
|---|---|
| Light Kit | Provides the electrical components |
| Shade | Covers the light bulb |
| Screws | Secures the components |
| Tools | Assists in assembly |
Creating pendant lights is fun and rewarding. They add a unique touch to any room. Enjoy your new, bright space!
Crafting Table Lamps
Creating your own table lamp is both fun and rewarding. You can design a lamp that fits your style and decor. This guide will help you select materials and assemble your lamp easily.
Material Selection
Choosing the right materials is crucial. You want your lamp to be safe and stylish. Here are some materials you might need:
- Lamp Base: Wood, metal, or ceramic bases work well.
- Lamp Shade: Fabric, paper, or glass shades are popular choices.
- Bulb: LED bulbs are energy-efficient and long-lasting.
- Socket: Ensure it fits your bulb and base.
- Switch: Choose between a toggle, rotary, or touch switch.
- Cord: A fabric-covered cord adds a stylish touch.
Assembly Instructions
Once you have your materials, it’s time to assemble your lamp. Follow these steps for a successful project:
- Prepare the Base: Drill a hole in the base for the cord. Ensure the base is stable.
- Attach the Socket: Connect the socket to the base. Make sure it is secure.
- Wire the Lamp: Thread the cord through the base and connect it to the socket.
- Install the Switch: Add the switch to the cord. Make sure it works properly.
- Fit the Shade: Attach the shade to the socket. Ensure it is balanced.
- Screw in the Bulb: Install the bulb and test the lamp. Make any necessary adjustments.
Your custom table lamp is now ready to use. Enjoy the unique touch it adds to your space!
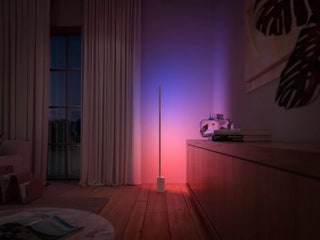
Building Floor Lamps
Floor lamps can add charm and function to any room. Building your own floor lamp is a fun DIY project. You get to create something unique and personal. Let’s explore how to design and build floor lamps.
Design Inspiration
Finding the right design is the first step. Look for inspiration in magazines, online, or in stores. Think about the style you want. Modern, vintage, or rustic styles are all popular. Decide on the materials you will use. Wood, metal, and glass are great choices. Consider the height and shape of your lamp.
Here are some design ideas:
- Tripod Floor Lamp: Uses three legs for a stable base. Looks modern and sleek.
- Arc Floor Lamp: Features a long, curved arm. Great for reading nooks.
- Tree Floor Lamp: Has multiple light sources. Adds a unique touch to your room.
Choose a design that fits your space and taste.
Construction Process
Once you have your design, gather your materials and tools. You might need:
- Wood or metal poles
- Lamp kit (socket, cord, switch)
- Base (wood, metal, or heavy stone)
- Paint or stain
- Screws and screwdriver
- Drill
Follow these steps to build your floor lamp:
- Prepare the Base: Drill a hole in the center of your base. This will hold the pole.
- Attach the Pole: Insert the pole into the hole. Secure it with screws.
- Install the Lamp Kit: Follow the instructions in the lamp kit. Attach the socket to the top of the pole. Run the cord through the pole and base.
- Finish the Lamp: Paint or stain the pole and base. Let it dry completely.
- Add the Lampshade: Choose a shade that matches your design. Attach it to the socket.
Your floor lamp is now ready to light up your space! Enjoy the warm glow and the satisfaction of creating it yourself.
Making Wall Sconces
Wall sconces add charm and warmth to any room. They can transform a dull wall into a focal point. Making your own wall sconces lets you add a personal touch to your space.
Creative Designs
There are endless designs for DIY wall sconces. You can use mason jars, wooden planks, or even metal pipes. The key is to match the sconce with your room’s style.
- Mason Jar Sconces: Fill jars with fairy lights for a cozy effect.
- Wooden Plank Sconces: Attach a bulb holder to a rustic plank.
- Metal Pipe Sconces: Use industrial pipes for a modern look.
Choose materials that fit your room’s theme. Mix and match for a unique design.
Installation Tips
Installing wall sconces can be simple. Follow these steps for a smooth installation:
- Decide on the sconce height. Eye level is often best.
- Mark the spots for screws. Use a level to ensure alignment.
- Drill holes for the screws. Insert wall anchors if needed.
- Attach the sconce base to the wall. Secure it tightly.
- Connect the wiring. Follow safety guidelines or consult an electrician.
- Attach the sconce cover. Ensure everything is secure.
Here’s a table to summarize the tools you’ll need:
| Tool | Purpose |
|---|---|
| Drill | To make holes for screws |
| Screwdriver | To secure the sconce base |
| Level | To ensure alignment |
| Wire Strippers | To prepare wires for connection |
Always prioritize safety during installation. Ensure the power is off before working with wires.

Credit: www.pinterest.com
Designing String Lights
Designing string lights can transform any room. They add a touch of magic. You can create unique patterns and enjoy easy installation. Let’s dive into the details.
Unique Patterns
String lights come in many shapes and sizes. You can twist them into unique patterns. These patterns can spell out words or create shapes. Imagine a heart-shaped string light on your wall. It can bring warmth and love to your room.
Here are some ideas for unique patterns:
- Zigzag: Create a fun and lively look.
- Waves: Add a calming effect to your space.
- Geometric Shapes: Try circles, triangles, or squares for a modern touch.
Use string lights to match your room’s theme. They can be a focal point or a subtle enhancement. Experiment with colors and patterns for the best effect.
Easy Installation
Installing string lights is simple. Most string lights come with hooks or adhesive strips. You can hang them on walls, ceilings, or furniture.
Here’s a basic guide for easy installation:
- Plan: Decide where you want the lights.
- Measure: Ensure you have enough length for your design.
- Attach: Use hooks or adhesive strips to secure the lights.
- Power Up: Plug in the lights and enjoy the glow.
String lights are versatile. You can use them in bedrooms, living rooms, or outdoor spaces. They are safe and easy to handle. Follow these steps and brighten your space creatively.
Remember, string lights are not just for holidays. They can be a part of your everyday decor. Enjoy creating your unique designs and easy installations.
Upcycling Old Items
Upcycling old items can transform your home lighting. It’s a great way to brighten your space while being eco-friendly. You can turn unused items into stunning light fixtures. This adds a unique touch to your decor.
Repurposing Techniques
Repurposing old items is easy with the right techniques. You can use everyday objects and give them new life. Here are some methods to try:
- Jars and Bottles: Turn glass jars and bottles into lamps.
- Old Cans: Poke holes in old cans to create lanterns.
- Wooden Pallets: Use wooden pallets to make rustic chandeliers.
| Item | New Use |
|---|---|
| Wine Bottles | Pendant Lights |
| Mason Jars | Lanterns |
| Wood Scraps | Wall Sconces |
Creative Ideas
There are many creative ideas to upcycle old items for lighting. Here are some inspirational projects to get started:
- Teacup Lamps: Use old teacups and saucers as lamp bases.
- Colander Light: Turn a metal colander into a kitchen light fixture.
- Book Lamps: Stack old books to create a lamp base.
These projects are fun and easy to do. They also make great conversation pieces. Start upcycling today and watch your space come alive with light!
Incorporating Natural Elements
Incorporating natural elements into your DIY lighting projects can transform your space. Using organic materials like wood and plants adds a fresh, earthy vibe. These projects are fun and easy to do. They also bring a touch of nature indoors.
Wood-based Projects
Wood is a versatile material for DIY lighting. It’s easy to work with and adds a warm, rustic charm to any space. Here are some ideas:
- Wooden Lamp Base: Use a piece of driftwood or a tree branch. Attach it to a lamp kit for a unique look.
- Pallet Light: Repurpose an old pallet. Add string lights for a cozy feel.
- Wooden Pendant Light: Carve a pendant light from a log. Hang it from the ceiling for a statement piece.
Using Plants
Plants can also be incorporated into your lighting projects. They bring life and freshness to your space. Here are some ideas:
- Hanging Plant Light: Combine a hanging light with a small potted plant. It creates a beautiful and functional piece.
- Terrarium Lamp: Create a terrarium inside a clear lamp base. Add small plants for a mini-garden effect.
- Plant Shelf Light: Install LED strips under a shelf. Place potted plants on the shelf for a glowing garden.
Using Led Technology
LED technology has revolutionized home lighting. It offers energy efficiency and versatility. You can use LEDs to create stunning DIY lighting projects. Let’s explore the advantages of LEDs and some creative DIY LED projects.
Advantages Of Leds
LEDs, or Light Emitting Diodes, bring many benefits:
- Energy Efficiency: LEDs use less power than traditional bulbs.
- Longevity: LEDs have a longer lifespan. They can last up to 50,000 hours.
- Durability: LEDs are more durable. They resist breaking better than glass bulbs.
- Eco-Friendly: LEDs are environmentally friendly. They contain no toxic elements.
- Versatility: LEDs come in various colors and designs. They fit any project.
Diy Led Projects
Creating your own LED lighting projects can be fun and rewarding. Here are a few ideas:
- LED Strip Lights: Use LED strips to highlight shelves or cabinets. They add a modern touch.
- LED Bottle Lights: Place LED lights in old bottles. They make unique table lamps.
- LED Wall Art: Create wall art using LED lights. Shape them into letters or designs.
- LED Garden Lights: Brighten your garden paths with LED lights. They enhance night-time beauty.
- LED Desk Lamp: Build a custom LED desk lamp. Use flexible LED strips for adjustable lighting.
| Project | Materials Needed |
|---|---|
| LED Strip Lights | LED strips, adhesive tape, power supply |
| LED Bottle Lights | Empty bottles, LED fairy lights |
| LED Wall Art | LED strips, mounting hardware |
| LED Garden Lights | Outdoor LED lights, stakes |
| LED Desk Lamp | Flexible LED strips, lamp base |
These projects are easy to do. They bring a unique charm to your space. Start with simple projects. You can gradually move to more complex designs.
Creating Mood Lighting
Lighting plays a crucial role in setting the mood of any room. DIY lighting projects give you the freedom to create unique lighting solutions. These projects can transform any space into a cozy retreat or a vibrant gathering spot.
Color Theory
Colors impact our emotions and can set the mood of a room. Warm colors like red and orange create a cozy and inviting atmosphere. Cool colors like blue and green offer a calming effect.
Use the color wheel to mix and match colors. Complementary colors are opposite each other on the wheel and provide balance. Analogous colors are next to each other and create harmony.
| Color | Effect |
|---|---|
| Red | Energetic and warm |
| Blue | Calm and serene |
| Green | Relaxing and natural |
Practical Applications
Use string lights to add a whimsical touch to any room. Wrap them around bedposts, mirrors, or shelves. Install dimmable lights for flexibility. Adjust the brightness based on the activity or time of day.
Consider LED strips under cabinets or along baseboards. These lights create a modern and sleek look. Use lamps with colored bulbs to change the room’s atmosphere easily.
- Wrap string lights around furniture
- Install dimmable lights
- Use LED strips for a modern touch
- Add lamps with colored bulbs
With these tips, you can create the perfect mood lighting for any space. Explore different options and let your creativity shine.
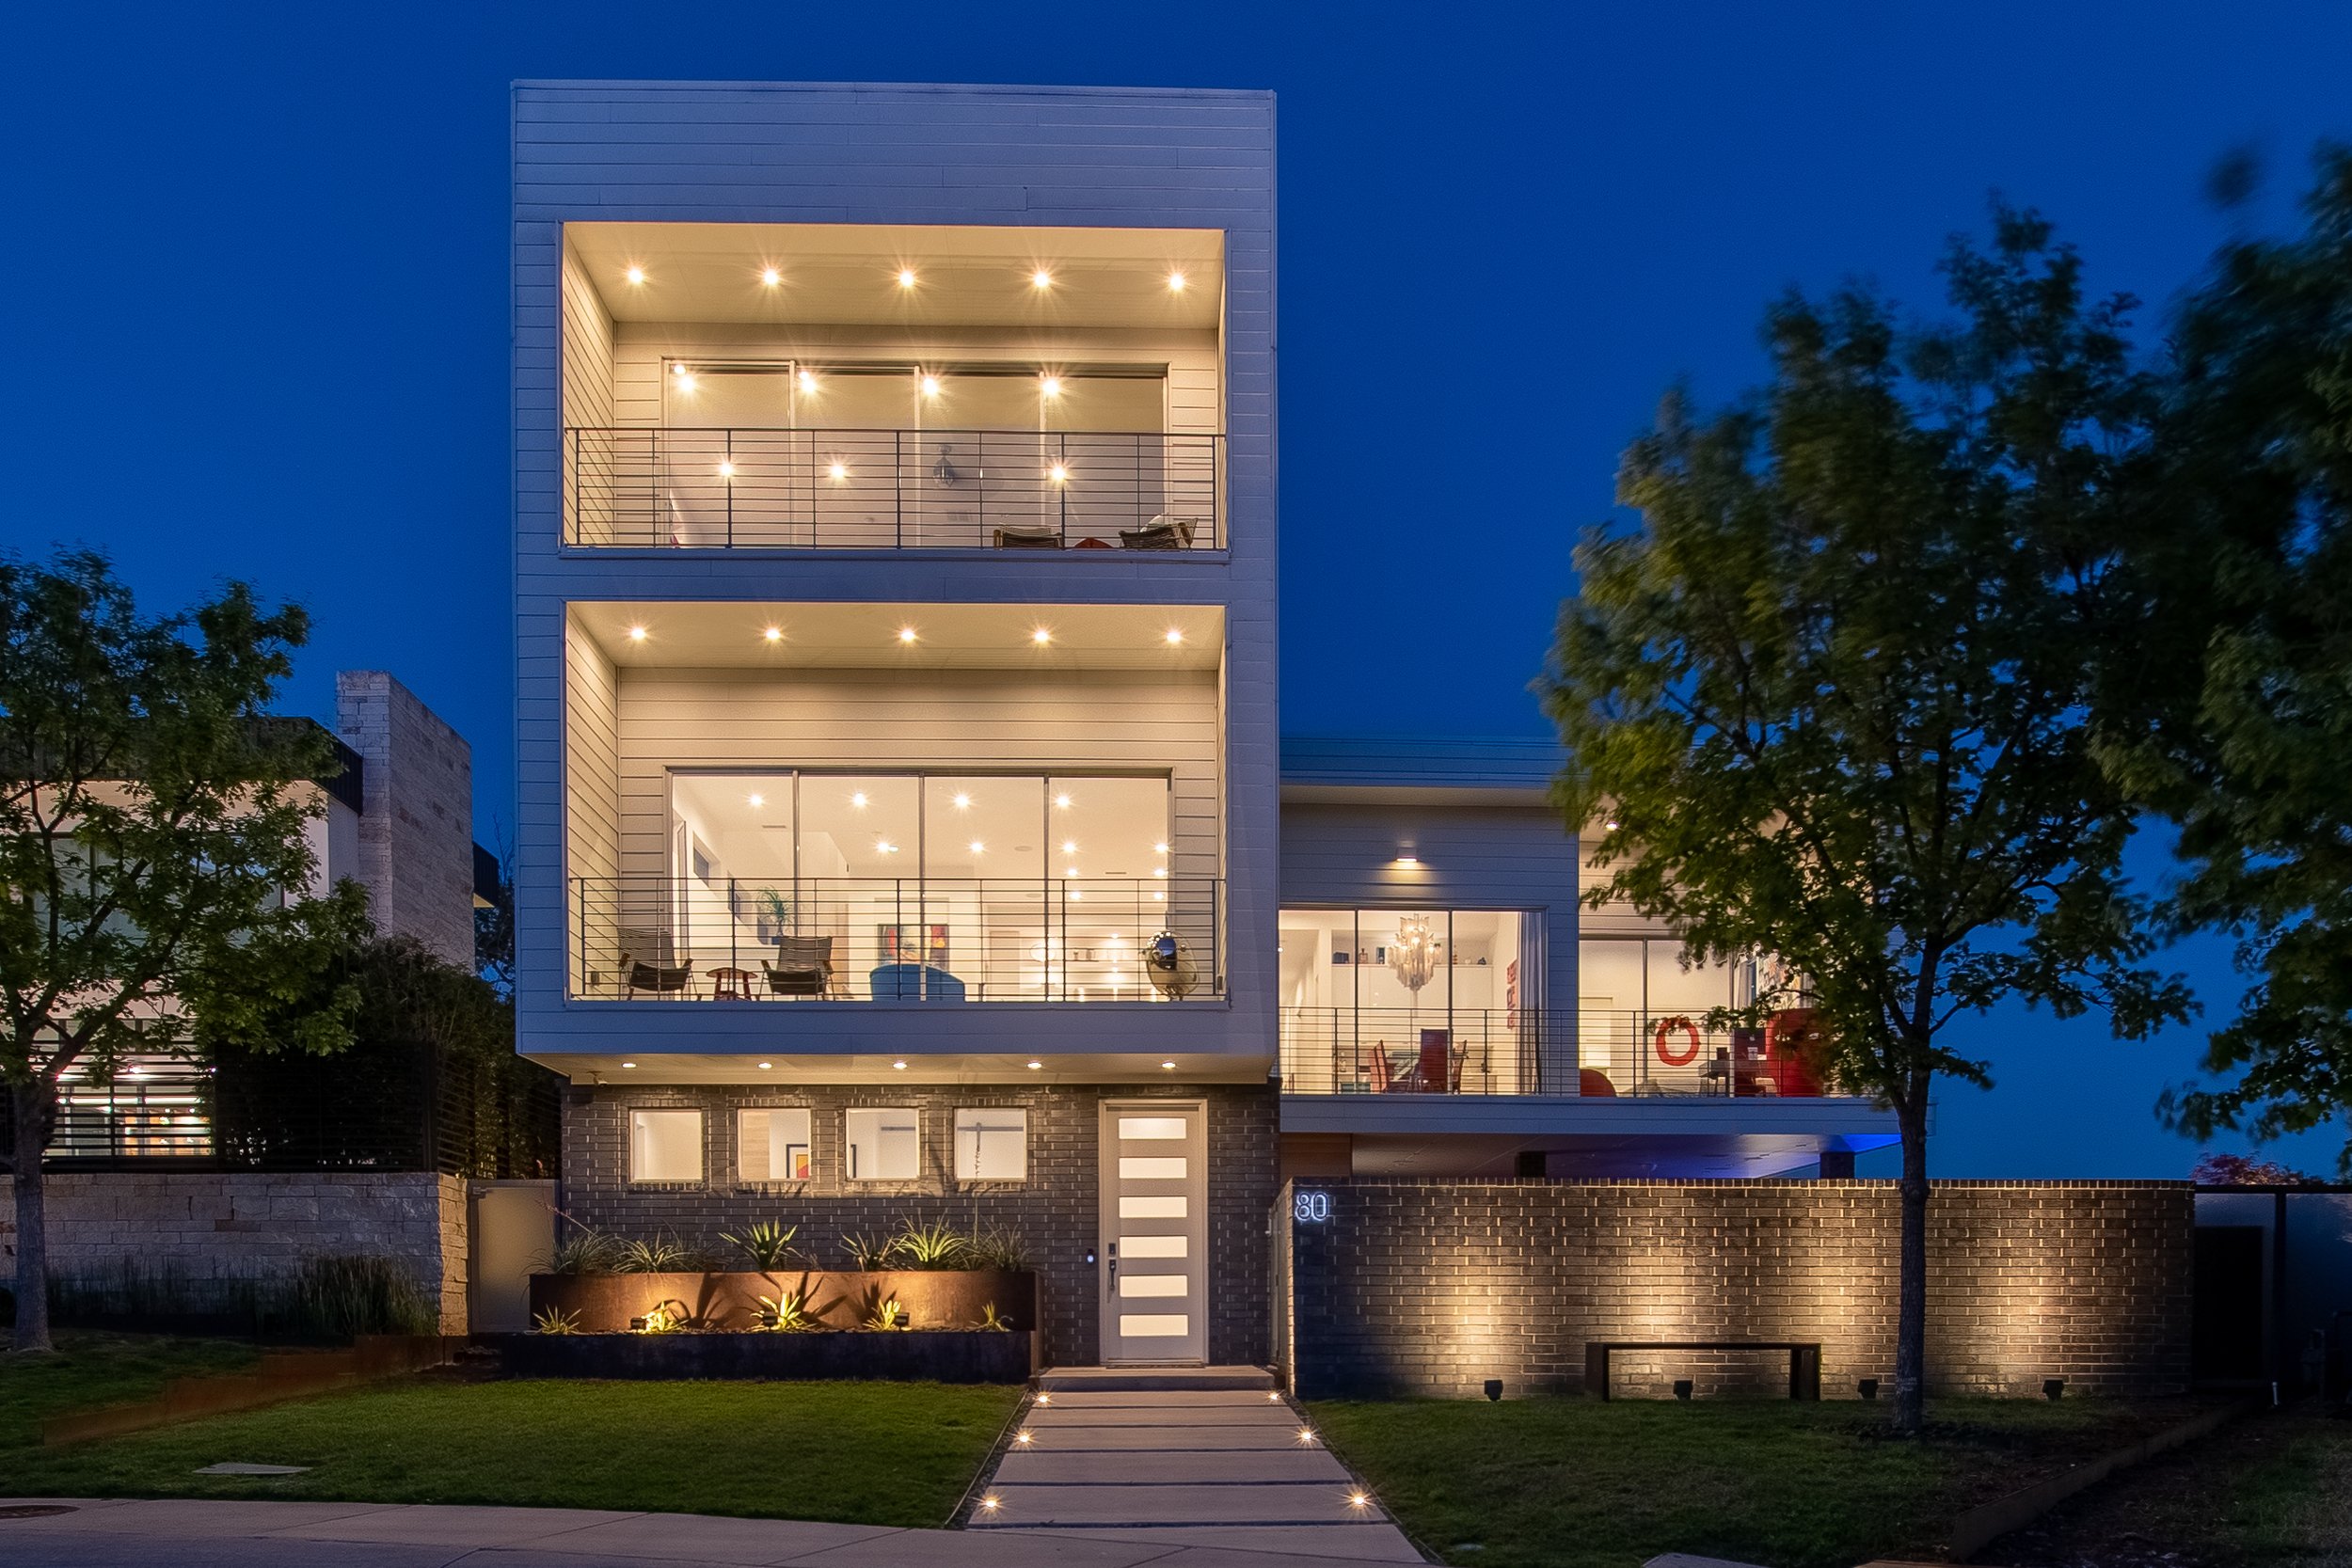
Outdoor Lighting Ideas
Outdoor lighting transforms any space into a magical wonderland. Whether you have a garden, patio, or backyard, DIY lighting projects can brighten your space creatively. Below are some outdoor lighting ideas to inspire you.
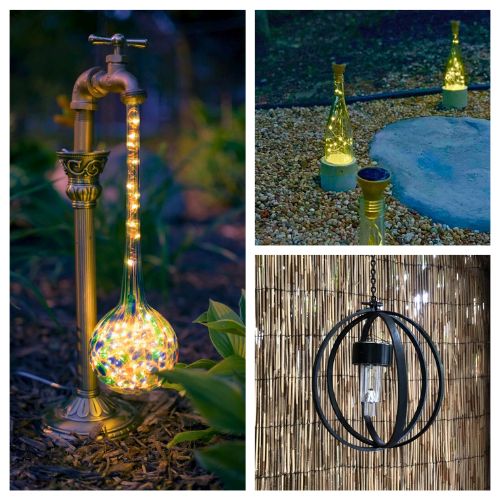
Garden Lights
Garden lights can enhance the beauty of your plants and flowers. Use solar-powered lights for an eco-friendly option. These lights charge during the day and shine at night.
- Pathway Lights: Light up your garden paths with small LED lights.
- String Lights: Drape string lights over bushes or trees for a fairy-tale effect.
- Lanterns: Place lanterns around the garden to create a cozy atmosphere.
You can also make DIY garden lights using mason jars. Fill jars with fairy lights and hang them from tree branches. This creates a whimsical look and feels magical.
Patio Illumination
Your patio can become a perfect hangout spot with the right lighting. Patio illumination makes evenings more enjoyable. Here are some ideas:
| Lighting Idea | Description |
|---|---|
| String Lights | Hang them across the patio for a festive look. |
| Candles | Use LED candles for safety and a warm glow. |
| Fire Pit | A fire pit provides light and warmth. |
Another fun idea is to use DIY lanterns. You can make lanterns from old cans. Punch holes in the cans and place a candle inside. This creates beautiful patterns when lit.
With these outdoor lighting ideas, you can make your space inviting and beautiful. Whether you choose garden lights or patio illumination, your outdoor area will shine.
Seasonal Lighting Projects
Seasonal lighting projects can add a special touch to your space. They can make your home feel warm and inviting. With a bit of creativity, you can create stunning light displays that fit any season. Let’s explore some ideas for seasonal lighting projects that you can easily DIY.
Holiday Themes
For the holidays, lighting can enhance your decorations. Try using string lights to create shapes. You can make stars, trees, or even reindeer. Use different colors to match the holiday theme.
- Christmas: Green and red lights can create a festive mood.
- Halloween: Orange and purple lights can make your home spooky.
- Easter: Pastel-colored lights can add a soft, cheerful touch.
Consider using LED lights for energy efficiency. They last longer and save on electricity. You can also use battery-operated lights for more flexibility.
Seasonal Adjustments
As the seasons change, so can your lighting. Each season brings its own charm. Adjust your lighting to reflect the current season.
| Season | Lighting Ideas |
|---|---|
| Spring | Use soft, pastel lights. Add lights to garden areas. |
| Summer | Bright, vibrant lights. Use string lights for outdoor parties. |
| Fall | Warm, amber lights. Highlight autumn decorations. |
| Winter | Cool, white lights. Create a cozy indoor atmosphere. |
Switching up your lighting can make your space feel fresh. It can also help you celebrate the season in style.
Smart Lighting Solutions
Transform your home with smart lighting solutions. These solutions provide convenience and energy efficiency. Enjoy the power of controlling lights with technology.
Integrating Smart Tech
Smart lighting integrates with your home’s technology. It connects to smart devices like phones and tablets. This allows you to control lights from anywhere.
Use smart bulbs or smart switches. These devices connect to your Wi-Fi. You can set schedules and automate your lighting.
| Device | Function |
|---|---|
| Smart Bulbs | Change color and brightness |
| Smart Switches | Control traditional bulbs |
Voice-controlled Lights
Voice-controlled lights add an extra layer of convenience. They work with voice assistants like Alexa and Google Assistant.
- Turn lights on or off with voice commands
- Change the light color with your voice
- Adjust brightness levels hands-free
Setting up voice-controlled lights is simple. Connect your lights to a compatible voice assistant. Use short, clear commands for best results.
Budget-friendly Options
Creating your own lighting projects can be fun and cost-effective. You don’t need to spend a lot to brighten your space creatively. Here are some budget-friendly options to help you get started.
Cost-effective Materials
Many materials can be used for DIY lighting projects without breaking the bank. Here are a few ideas:
- Recycled jars and bottles: Use old jars and bottles to make lanterns.
- Cardboard: Create lampshades and light covers from recycled cardboard.
- Wood scraps: Use leftover wood to build lamp bases and frames.
These materials are often free or very cheap. They can make your projects unique and sustainable.
Affordable Techniques
Using affordable techniques can make your DIY lighting projects shine. Here are some easy methods:
- LED strip lights: Attach these to any surface for instant brightness.
- Painted bulbs: Use glass paint to add color to clear bulbs.
- Paper lanterns: Fold paper into shapes and add a light inside.
These techniques are simple and can be done with minimal tools. They allow you to customize your lighting to fit your style and budget.
| Material | Cost |
|---|---|
| Recycled jars | Free |
| Cardboard | Free |
| Wood scraps | Free or Cheap |
| LED strip lights | Low |
By using these cost-effective materials and affordable techniques, you can create beautiful DIY lighting projects. They will brighten your space without emptying your wallet.
Personalizing Your Projects
DIY lighting projects offer endless opportunities to add your unique style. Personalizing your lighting can make your space feel more like home. Small changes can make a big difference in the overall look.
Custom Designs
Creating custom designs allows you to control every detail. Choose materials, colors, and styles that reflect your personality. Here are some ideas to get started:
- Hand-painted lamp shades: Use stencils or freehand designs.
- Recycled materials: Turn old jars into beautiful lanterns.
- Unique shapes: Create geometric light fixtures with straws or sticks.
Adding Personal Touches
Adding personal touches makes your projects even more special. Small details can turn a simple light into a statement piece. Consider these tips:
- Use family photos: Attach photos to a string light display.
- Incorporate favorite colors: Paint or wrap lights in your preferred shades.
- Add meaningful objects: Use souvenirs or keepsakes in your design.
| Material | DIY Project Idea |
|---|---|
| Wood | Rustic wood chandeliers |
| Metal | Industrial pipe lamps |
| Fabric | Colorful fabric lanterns |

Credit: www.thehandymansdaughter.com
Troubleshooting Common Issues
DIY lighting projects can be fun and rewarding. But sometimes, things don’t go as planned.
This section helps you troubleshoot common issues. We’ll address frequent mistakes and offer effective solutions.
Frequent Mistakes
Even the best DIYers make mistakes. Here are some common ones:
- Incorrect wiring: This can cause lights not to work.
- Wrong bulb type: Using the wrong bulb can damage your fixture.
- Poor connections: Loose connections can lead to flickering lights.
- Overloading circuits: This can trip breakers and cause outages.
Effective Solutions
Fixing these issues can be simple. Here are some solutions:
- Check the wiring: Ensure all wires are connected correctly.
- Use the right bulb: Always use the recommended bulb type.
- Tighten connections: Make sure all connections are secure.
- Avoid overloading: Don’t plug too many lights into one outlet.
If your DIY lighting project still has issues, a table might help. Here’s a quick reference:
| Issue | Possible Cause | Solution |
|---|---|---|
| No light | Incorrect wiring | Check and redo the wiring |
| Flickering light | Poor connection | Tighten all connections |
| Bulb burns out quickly | Wrong bulb type | Use the correct bulb |
| Breaker trips | Overloaded circuit | Reduce the load |
Remember, safety comes first. Always turn off the power before you start.
Showcasing Your Work
Creating DIY lighting projects is a fantastic way to personalize your space. Once you’ve completed your project, showcasing your work can be just as rewarding. Sharing your creative lighting can inspire others and give you a sense of accomplishment. Below are tips for capturing and sharing your DIY lighting projects.
Photography Tips
Good photos make your DIY lighting projects shine. Use a high-quality camera or smartphone. Here are some tips:
- Lighting: Use natural light for clear, bright images.
- Angles: Shoot from different angles for variety.
- Background: Keep the background clean and simple.
- Stability: Use a tripod for stable, sharp photos.
- Editing: Edit photos to enhance colors and brightness.
Sharing On Social Media
Social media platforms are great for sharing your DIY projects. Each platform has its strengths:
| Platform | Best For | Tips |
|---|---|---|
| Visual content | Use hashtags and stories | |
| Project inspiration | Create eye-catching pins | |
| Community sharing | Join DIY groups |
Engage with your audience by replying to comments. This helps build a community around your creative projects.
Future Trends In Diy Lighting
DIY lighting projects are revolutionizing home decor. They offer creativity and personalization. Future trends in DIY lighting will inspire you. Explore emerging styles and sustainable practices below.
Emerging Styles
New styles are taking the DIY lighting world by storm. These styles focus on creativity and uniqueness.
- Minimalist Designs: Clean lines and simple shapes make a bold statement.
- Vintage Revival: Old-school bulbs and fixtures bring nostalgic charm.
- Smart Lighting: Integrate technology for a modern touch.
Minimalist designs are very popular. They use few materials but look elegant. Vintage revival brings back old styles. People love the classic look. Smart lighting is also trending. It combines lights with technology. You can control these lights with your phone. This trend is perfect for tech lovers.
Sustainable Practices
Sustainability is key in modern DIY lighting projects. People care about the environment.
- Use Recycled Materials: Create lights with recycled items. This helps reduce waste.
- Energy-Efficient Bulbs: Opt for LED bulbs. They use less energy and last longer.
- Solar-Powered Lights: Harness the sun’s power. These lights are eco-friendly.
Using recycled materials is a smart choice. It helps reduce waste and is budget-friendly. Energy-efficient bulbs are another great option. They save electricity and money. Solar-powered lights use the sun’s energy. They are great for outdoor spaces. This makes them both eco-friendly and cost-effective.

Credit: www.amazon.com
Frequently Asked Questions
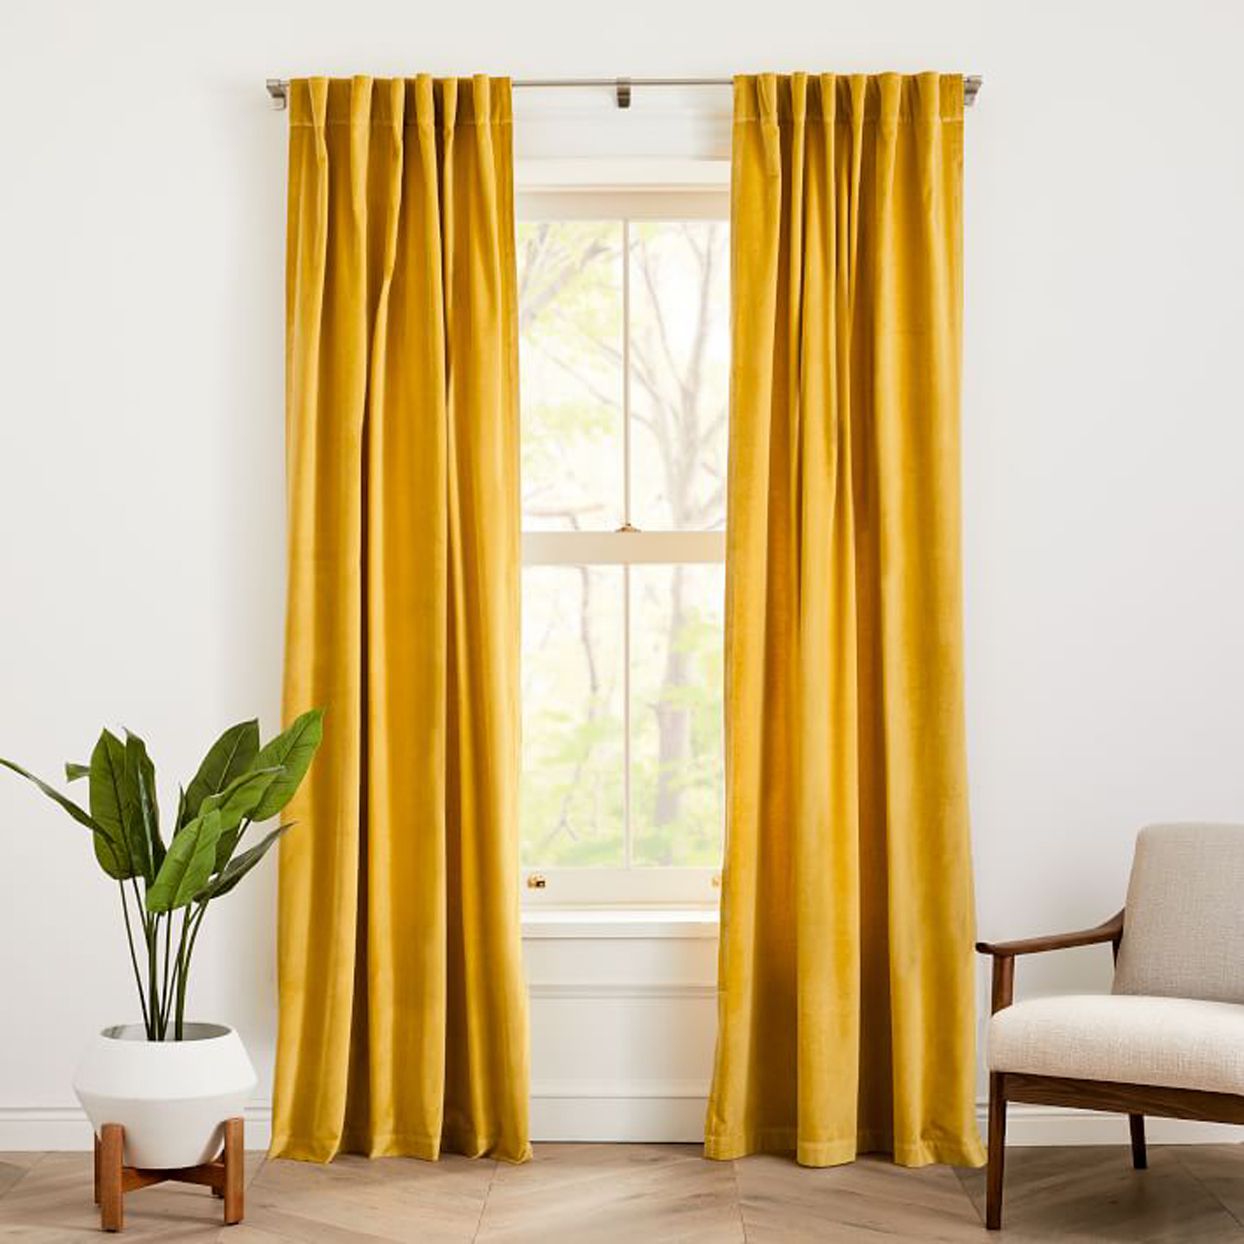
How Can I Illuminate My Room?
Illuminate your room by using LED bulbs, floor lamps, and table lamps. Incorporate natural light with sheer curtains. Use mirrors to reflect light.
How Do I Make Good Lighting In My House?
Use a mix of ambient, task, and accent lighting. Choose LED bulbs for energy efficiency. Install dimmer switches for flexibility. Position lights to avoid shadows. Use mirrors to reflect light.
What Materials Are Needed For Diy Lighting Projects?
Basic materials include light bulbs, wires, sockets, and decorative elements like jars or wood.
Can I Use Led Lights For Diy Projects?
Yes, LED lights are energy-efficient and versatile for DIY lighting projects.
How Do I Create A Mason Jar Lamp?
Insert a light bulb socket into the jar lid, secure it, and screw the lid back on.
Are Diy Lighting Projects Safe?
Yes, if done correctly and following electrical safety guidelines.
How Much Do Diy Lighting Projects Cost?
Costs vary but are generally affordable, depending on materials used.
What Tools Are Essential For Diy Lighting?
Common tools include wire cutters, pliers, screwdrivers, and a drill.
How Can I Customize My Diy Lighting?
Use paints, fabrics, or decorative items to personalize your lighting fixtures.
Can I Recycle Materials For Diy Lighting?
Absolutely, repurposing old items can make unique and eco-friendly lighting.
Conclusion
Brighten your home with DIY lighting projects. It’s creative, affordable, and fun. Experiment with various designs. Enjoy personalized, unique lighting solutions. Enhance your space and express your style. Dive into DIY lighting today and transform any room effortlessly.