Vinyl planks, peel-and-stick tiles, and painted concrete are budget-friendly DIY floors ideas. These options can transform your space without breaking the bank.
Updating your flooring doesn’t have to be expensive. Affordable DIY flooring options like vinyl planks, peel-and-stick tiles, and painted concrete can give your home a fresh look. These materials are easy to install and come in various styles and colors.
You can achieve a high-end appearance while sticking to a budget. Whether you prefer a modern, rustic, or classic design, there’s an affordable flooring solution to meet your needs. Transforming your space has never been easier or more cost-effective. Dive into these DIY ideas and elevate your home’s aesthetic without spending a fortune.
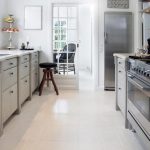
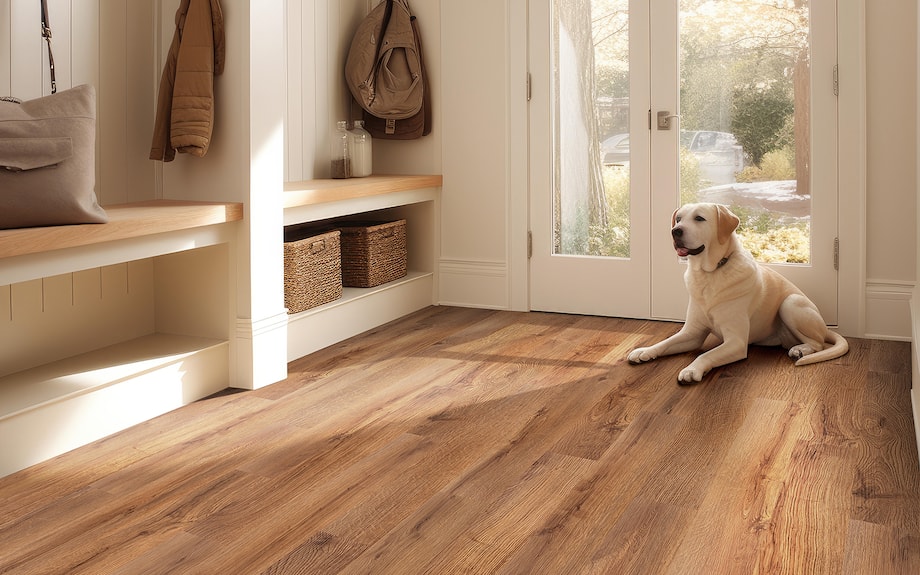
Credit: www.anthonymichaelinteriordesign.com
Budget-friendly Flooring
Transform your space with budget-friendly flooring options. You don’t need to break the bank to achieve a stylish look. Discover affordable choices and cost-saving tips to help you stay within your budget.
Affordable Options
There are many affordable flooring options available. Here are a few:
- Laminate Flooring: Durable and easy to install. Costs about $1-$3 per square foot.
- Vinyl Plank Flooring: Water-resistant and available in many styles. Prices range from $2-$5 per square foot.
- Peel-and-Stick Tiles: Simple to install and perfect for DIY projects. Costs around $1-$2 per square foot.
- Carpet Tiles: Soft and comfortable. Prices range from $1-$4 per square foot.
- Cork Flooring: Eco-friendly and soft underfoot. Costs about $3-$5 per square foot.
Cost-saving Tips
Save money with these easy tips:
- Measure Twice: Measure your space accurately to avoid buying too much material.
- Shop Sales: Look for sales and discounts at local stores and online.
- DIY Installation: Install the flooring yourself to save on labor costs.
- Reuse Materials: Use leftover materials from other projects if possible.
- Buy in Bulk: Purchase materials in bulk for potential discounts.
Consider these budget-friendly flooring ideas to transform your space without spending too much. With careful planning and smart choices, you can achieve a beautiful floor at a fraction of the cost.
Peel And Stick Tiles
Peel and stick tiles are a fantastic way to update your floors on a budget. They are easy to install, come in various designs, and require minimal tools. These tiles can transform your space quickly and affordably.
Installation Guide
Installing peel and stick tiles is simple and quick. Follow these steps to get it right:
- Clean the floor thoroughly. Remove any dirt, dust, or grease.
- Measure the area where you will place the tiles. Calculate the number of tiles needed.
- Start from the center of the room. Lay out tiles without peeling the backing to plan your layout.
- Peel off the backing of the first tile. Carefully place it on the floor.
- Press down firmly to ensure it sticks well. Use a roller for better adhesion.
- Continue placing tiles. Ensure the edges align properly.
- Cut tiles to fit edges and corners using a utility knife.
- Once all tiles are placed, check for any loose edges and press them down.
Design Ideas
Peel and stick tiles offer various designs to suit any style. Here are some ideas:
- Marble Look: Get the elegance of marble without the high cost.
- Wood Grain: Achieve a warm, rustic feel with wood-patterned tiles.
- Geometric Patterns: Add a modern touch with bold, geometric designs.
- Mosaic Styles: Create a unique look with intricate mosaic patterns.
- Solid Colors: Keep it simple and clean with solid-colored tiles.
With these peel and stick tiles, you can easily transform your space. Choose a design that matches your taste and see the difference.
Painted Plywood Floors
Transform your home with painted plywood floors. This budget-friendly option can add charm and character to any room. With the right preparation and a bit of creativity, you can achieve stunning results that will leave your space looking fresh and stylish.
Preparation Steps
Proper preparation is key to achieving beautiful painted plywood floors. Follow these steps for the best outcome:
- Clean the Plywood: Sweep and vacuum the floor to remove all dirt and debris.
- Sand the Surface: Use a sander to smooth out rough spots and create a uniform surface.
- Fill Gaps and Holes: Apply wood filler to any imperfections and allow it to dry.
- Sand Again: Lightly sand the filled areas to ensure an even surface.
- Prime the Floor: Use a high-quality primer to seal the wood and prepare it for paint.
- Let it Dry: Allow the primer to dry completely before moving to the next step.
Creative Patterns
Once your plywood floor is prepared, it’s time to get creative. Here are some pattern ideas to inspire you:
- Geometric Shapes: Use painter’s tape to create triangles, squares, or hexagons.
- Stripes: Paint bold, colorful stripes for a modern look.
- Checkerboard: Alternate colors to create a classic checkerboard pattern.
- Stencils: Use stencils to add intricate designs and details.
For more complex patterns, plan your design on paper first. This helps to visualize the final outcome.
Here is a quick table to summarize the steps and tips:
| Step | Description |
|---|---|
| Cleaning | Remove dirt and debris from the floor. |
| Sanding | Smooth out the surface with a sander. |
| Filling | Fill gaps and holes with wood filler. |
| Priming | Apply primer to seal the wood. |
| Patterning | Use tape and stencils for creative designs. |
Painting your plywood floors is a cost-effective way to refresh your space. With careful preparation and a touch of creativity, you can achieve a stunning result that looks professional and unique.
Laminate Flooring
Laminate flooring offers a stylish and budget-friendly way to update your home. It mimics the look of wood, stone, or tile without the high cost. Easy to install and maintain, it’s perfect for DIY enthusiasts.
Pros And Cons
| Pros | Cons |
|---|---|
|
|
Installation Tips
Installing laminate flooring is straightforward and perfect for beginners. Follow these steps to ensure a smooth process:
- Prepare the subfloor: Ensure it’s clean, dry, and level.
- Acclimate the planks: Let them sit in the room for 48 hours.
- Use an underlayment: This provides cushioning and noise reduction.
- Start with the longest wall: Lay the first row along this wall.
- Stagger the seams: Ensure joints are staggered for stability.
- Trim the edges: Use a saw for precise cuts around corners.
- Snap and lock: Click the planks into place for a secure fit.
With these tips and tools, you can install laminate flooring like a pro. Transform your space without breaking the bank.
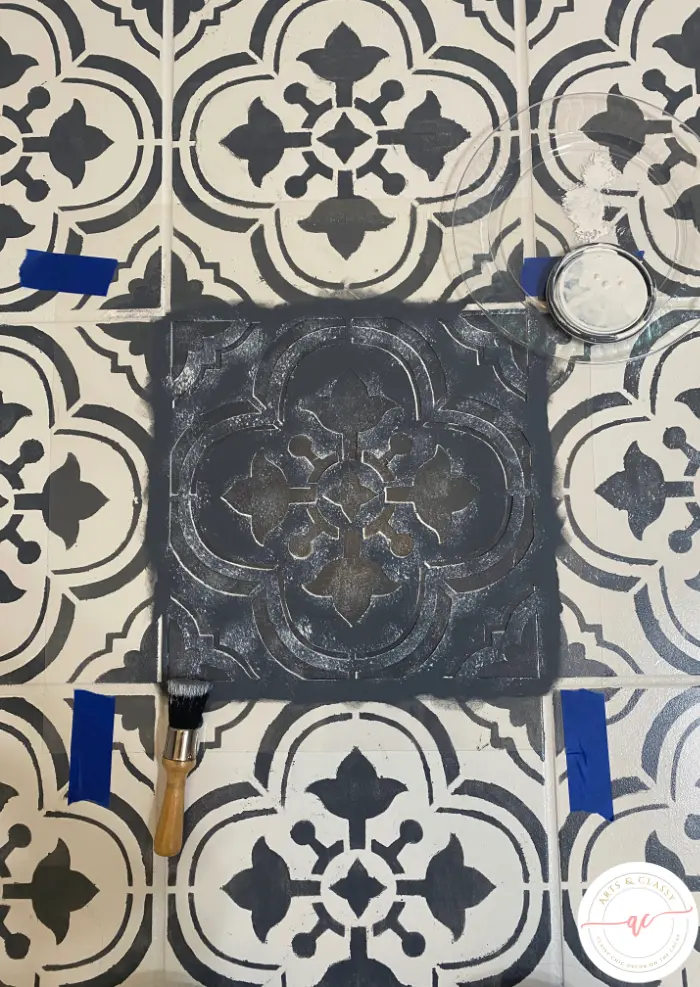
Stenciled Concrete
Stenciled concrete is a fantastic way to revamp your floors without breaking the bank. With a little creativity and effort, you can transform any concrete floor into a stunning focal point. This method is cost-effective and allows for endless design possibilities.
Materials Needed
- Concrete Cleaner
- Concrete Primer
- Stencil of Your Choice
- Painter’s Tape
- Concrete Paint
- Paint Roller
- Stencil Brush
- Sealer
Step-by-step Process
- Prepare the Surface
- Apply the Primer
- Position the Stencil
- Paint the Design
- Remove the Stencil
- Repeat the Process
- Seal the Floor
Clean the concrete floor using a concrete cleaner. Ensure the surface is free from dust and grease.
Use a paint roller to apply a coat of concrete primer. Let it dry completely before moving to the next step.
Place the stencil on the floor and secure it with painter’s tape. Ensure it is flat and well-adhered to avoid paint bleed.
Use a stencil brush to apply concrete paint over the stencil. Use light dabbing motions to avoid smudges.
Carefully lift the stencil while the paint is still wet. This helps to achieve clean lines.
Reposition the stencil and repeat steps 3 and 4 until the entire floor is covered with the design.
Once the paint is dry, apply a sealer to protect your new design. This ensures longevity and durability.
Using stenciled concrete can dramatically change the look of your space. It’s an affordable way to add a touch of personality and elegance to any room.
Vinyl Plank Flooring
Vinyl plank flooring is a popular choice for budget-friendly home improvement. It offers the look of real wood at a fraction of the cost. This flooring option is both durable and stylish. Let’s explore its benefits and how to install it yourself.
Benefits
- Affordability: Vinyl plank flooring is cost-effective.
- Durability: It withstands high traffic and is water-resistant.
- Easy Maintenance: Cleaning is simple with just a mop and broom.
- Aesthetic Appeal: Mimics the look of real wood.
- Comfort: Softer underfoot compared to tile or hardwood.
- Variety: Comes in numerous colors and styles.
Diy Installation
Installing vinyl plank flooring yourself can save money. Follow these steps for a successful installation:
- Prepare the Subfloor: Ensure the subfloor is clean and smooth.
- Measure the Room: Measure the room’s length and width.
- Cut the Planks: Use a utility knife to cut the planks to size.
- Lay the Planks: Start from one corner and work your way out.
- Secure the Planks: Snap the planks together, ensuring a tight fit.
- Finish the Edges: Use trim to cover any gaps at the edges.
For best results, take your time during installation. A well-installed floor can last for many years.
Reclaimed Wood
Reclaimed wood adds a touch of rustic charm to any space. It is an eco-friendly and budget-friendly option for flooring. This type of wood is sourced from old barns, factories, and warehouses. Let’s explore how you can use reclaimed wood to transform your space.
Sourcing Materials
Finding the right reclaimed wood is crucial. You can source reclaimed wood from:
- Local salvage yards
- Online marketplaces
- Construction site leftovers
Always check the wood for pests and damages. Inspect each piece carefully. Look for wood that has a history and character. Avoid wood that is too damaged or warped.
Installation Techniques
Installing reclaimed wood can be a DIY project. Follow these steps:
- Prepare the Subfloor: Ensure it is clean and level.
- Measure and Cut: Use a saw to fit the wood planks.
- Lay the Planks: Start from one corner and work your way across.
- Secure the Wood: Use nails or adhesives to fix the planks in place.
- Finish: Sand and seal the wood for durability.
Use a table to organize your tools and materials:
| Tool/Material | Purpose |
|---|---|
| Saw | Cut the wood planks |
| Hammer and Nails | Secure the planks |
| Sandpaper | Smooth the surface |
| Wood Sealant | Protect the wood |
Reclaimed wood flooring adds a unique touch to your home. It’s cost-effective and environmentally friendly. With a bit of effort, you can create a stunning floor that tells a story.
Area Rugs
Area Rugs can transform any room on a budget. They add color, warmth, and style. With the right techniques, rugs can make your space look chic and cozy.
Choosing The Right Rug
Choosing the right rug is crucial. Start with the size. Measure your space carefully. A too-small rug looks awkward. A too-large rug overwhelms the room.
- Materials: Opt for materials like wool, cotton, or jute. They are durable and cost-effective.
- Patterns: Geometric patterns add a modern touch. Floral patterns bring a classic feel.
- Colors: Neutral colors blend well with any decor. Bold colors make a statement.
Layering Techniques
Layering rugs adds depth and texture. It’s a trendy way to update your space. Start with a large, neutral base rug.
- Place a smaller, patterned rug on top.
- Ensure the top rug contrasts with the base rug.
- Align the rugs for a balanced look.
| Base Rug | Top Rug |
|---|---|
| Neutral color, simple design | Bold color, intricate pattern |
| Solid color, large size | Geometric pattern, smaller size |
Use these budget-friendly tips to transform your space. Rugs make a big impact with little cost. Try different styles and find what suits you best.
Carpet Tiles
Carpet tiles offer an affordable DIY flooring solution that can easily transform any space. Their versatility and ease of installation make them perfect for budget-friendly home makeovers.
Carpet tiles are a great budget-friendly flooring option. They are easy to install and come in various colors and patterns. This makes them perfect for any room. You can mix and match to create unique designs. Carpet tiles are also durable and easy to replace if damaged.
Installation Methods
Installing carpet tiles is a simple process. There are a few methods you can use:
- Peel and Stick: These tiles have an adhesive backing. Just peel off the paper and stick them to the floor.
- Glue Down: Apply a special carpet adhesive to the floor. Then press the tiles into place.
- Floating: Lay the tiles on the floor without any adhesive. They stay in place because of their weight.
Keeping your carpet tiles clean is important for their longevity. Here are some tips:
- Vacuum regularly to remove dirt and debris.
- Spot clean stains with a mild detergent and water.
- Replace damaged tiles easily by pulling them up and placing a new one.
For heavy stains, you can use a carpet cleaner. Always follow the manufacturer’s instructions. Rotate the tiles occasionally to ensure even wear. This will keep your carpet tiles looking new for longer.
| Method | Pros | Cons |
|---|---|---|
| Peel and Stick | Easy to install | May lose stickiness over time |
| Glue Down | Strong hold | Harder to remove |
| Floating | No adhesive needed | May shift slightly |
Epoxy Floors
Epoxy floors are an affordable way to transform your space. They are durable, easy to clean, and come in various styles. This guide will help you understand the application process and design variations for epoxy flooring.
Application Process
The application process for epoxy floors is simple. Follow these steps:
- Clean the Surface: Ensure the floor is free of dirt and debris.
- Prepare the Floor: Sand any rough spots and fill cracks.
- Mix the Epoxy: Follow the manufacturer’s instructions for mixing.
- Apply the Primer: Use a roller to apply a thin layer of primer.
- Apply the Epoxy: Pour the epoxy and spread evenly with a roller.
- Let it Cure: Allow the floor to cure for 24-72 hours.
Proper preparation ensures a long-lasting and beautiful floor.
Design Variations
Epoxy floors offer many design variations. Here are some popular options:
- Solid Color: A single color provides a clean, modern look.
- Metallic Finish: Creates a shiny, reflective surface.
- Flake Finish: Adds texture and color with decorative flakes.
- Marble Effect: Mimics the appearance of natural stone.
Each design adds a unique touch to your space. Choose the one that fits your style and budget.
Cork Flooring
Cork flooring is an excellent budget-friendly option. It offers style, comfort, and sustainability. This natural material comes from the bark of cork oak trees. Cork flooring provides a soft underfoot feel, making it a cozy choice for any room.
Advantages
- Eco-Friendly: Cork is a renewable resource. Harvesting doesn’t harm trees.
- Comfort: Soft and cushiony, great for standing long periods.
- Insulation: Naturally insulates against sound and temperature.
- Hypoallergenic: Resists mold, mildew, and allergens.
- Durable: Cork can withstand heavy foot traffic.
Diy Guide
- Gather Materials: Cork tiles, adhesive, utility knife, and measuring tape.
- Prepare the Subfloor: Ensure it is clean, dry, and level.
- Measure and Cut: Measure your space, cut tiles to fit.
- Apply Adhesive: Spread adhesive on the subfloor. Use a notched trowel.
- Lay the Tiles: Place cork tiles carefully, pressing firmly.
- Seal the Floor: Apply a water-based polyurethane sealant.
Below is a quick-reference table for cork flooring tools and materials:
| Tools | Materials |
|---|---|
| Utility Knife | Cork Tiles |
| Measuring Tape | Adhesive |
| Notched Trowel | Water-Based Polyurethane Sealant |
With cork flooring, you can transform your space without breaking the bank. It’s a simple DIY project that brings warmth and comfort to your home.
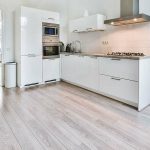
Credit: www.artsandclassy.com
Floating Floors
Are you seeking an affordable way to revamp your floors? Floating floors offer an excellent solution. They are easy to install and come in various types. This section explores different floating floor options and provides a step-by-step installation guide.
Types Available
Floating floors come in several materials. Each has unique benefits. Below are some popular options:
| Type | Features |
|---|---|
| Laminate | Durable, easy to clean, available in many designs |
| Engineered Wood | Real wood surface, stable, moisture-resistant |
| Luxury Vinyl Plank (LVP) | Waterproof, realistic wood look, soft underfoot |
| Cork | Eco-friendly, comfortable, sound-absorbing |
Installation Steps
Installing floating floors is straightforward. Follow these simple steps:
- Prepare the Subfloor: Ensure the subfloor is clean and dry.
- Lay the Underlayment: Roll out underlayment to smooth the surface.
- Start with the First Plank: Place it along the longest wall.
- Click and Lock: Connect planks using the click-and-lock system.
- Trim as Needed: Cut planks to fit around corners and edges.
- Install Baseboards: Attach baseboards to cover expansion gaps.
With these steps, you can install floating floors yourself. Enjoy a refreshed and stylish space without breaking the bank.
Diy Tile Floors
Transforming your space with DIY tile floors can be both rewarding and affordable. With a bit of effort, you can create a stunning floor that looks professional. Let’s dive into the essential steps for choosing and laying tiles.
Choosing Tiles
Picking the right tiles is crucial for a successful project. Consider the following factors:
- Material: Ceramic, porcelain, and vinyl are popular choices.
- Durability: Ensure the tiles can withstand foot traffic.
- Style: Choose a design that complements your room.
Here’s a quick comparison table to help you decide:
| Type | Pros | Cons |
|---|---|---|
| Ceramic | Affordable, easy to cut | Less durable |
| Porcelain | Highly durable, waterproof | More expensive |
| Vinyl | Budget-friendly, easy to install | Can dent or scratch |
Laying Techniques
Proper laying techniques ensure your tiles last long and look great. Follow these steps:
- Prepare the Surface: Clean and level the floor.
- Dry Lay: Lay out tiles without adhesive to plan the layout.
- Apply Adhesive: Spread adhesive evenly with a trowel.
- Lay Tiles: Press tiles into adhesive, using spacers for gaps.
- Grout: Fill gaps with grout after adhesive dries.
- Seal: Apply a sealant to protect tiles and grout.
Remember to use a tile cutter for precise cuts. Wear safety gear to protect yourself while working.
Pallet Wood Floors
Transforming your space with pallet wood floors is a fantastic DIY option. This budget-friendly idea adds a rustic charm to any room. Repurposing old pallets is eco-friendly and cost-effective. You can create a unique floor that stands out. Below is a detailed guide to help you get started.
Preparation
Proper preparation ensures a smooth installation process. Follow these steps for the best results:
- Gather Materials: Collect wooden pallets, nails, screws, and tools.
- Inspect Pallets: Ensure pallets are free from mold and pests.
- Clean and Sand: Clean the pallets thoroughly and sand them to remove rough edges.
- Disassemble Pallets: Carefully take apart the pallets using a crowbar.
- Measure the Room: Measure the space to determine the amount of wood needed.
Installation Guide
Follow these simple steps to install your pallet wood floor:
- Lay Underlayment: Start by laying an underlayment to protect against moisture.
- Arrange Planks: Arrange the wood planks on the floor to find the best pattern.
- Cut to Size: Cut the planks to fit the room dimensions.
- Secure Planks: Nail or screw the planks into place, ensuring they are secure.
- Finishing Touches: Sand the floor again and apply a finish or sealant.
Enjoy your new, beautiful, and budget-friendly pallet wood floor!
Outdoor Flooring
Transforming your outdoor space can be both exciting and budget-friendly. With the right outdoor flooring, you can create a beautiful patio without breaking the bank. Here are some ideas to get you started.
Patio Options
There are various patio flooring options available that can fit within your budget. Some popular choices include:
- Concrete Pavers: Durable and easy to install. They come in various shapes and colors.
- Wood Decking: Natural look that blends well with outdoor settings. Opt for treated wood to increase longevity.
- Gravel: Inexpensive and quick to install. Requires minimal maintenance.
- Outdoor Tiles: Stylish and versatile. Ideal for creating patterns and designs.
Budget Solutions
Transform your patio without spending a fortune. Here are some budget-friendly solutions:
- Recycled Materials: Use reclaimed wood or bricks. Eco-friendly and cost-effective.
- DIY Concrete Stamps: Create unique patterns on concrete by making your own stamps.
- Outdoor Rugs: Add a pop of color and style. Easy to replace and maintain.
- Gravel Pathways: Simple to install and perfect for creating walkways. Affordable and low-maintenance.
These ideas can help you achieve a stunning outdoor space without spending much. Experiment with different materials and designs to find what works best for you.
Linoleum Flooring
Transforming your space on a budget? Consider linoleum flooring. It’s affordable, durable, and eco-friendly. Linoleum flooring adds a touch of classic charm to any room.
Benefits
Linoleum flooring offers numerous benefits:
- Cost-effective: Linoleum is cheaper than many other flooring options.
- Durable: It can last up to 40 years with proper care.
- Eco-friendly: Made from natural materials like linseed oil, cork dust, and wood flour.
- Easy maintenance: Simple to clean with a damp mop.
- Variety of designs: Available in many colors and patterns to match any decor.
Diy Installation
Installing linoleum flooring is a straightforward DIY project. Follow these steps:
- Prepare the surface: Ensure the floor is clean, dry, and level.
- Measure and cut: Measure the room and cut the linoleum to fit.
- Apply adhesive: Spread adhesive on the floor using a trowel.
- Lay the linoleum: Carefully place the linoleum on the adhesive.
- Smooth out bubbles: Use a roller to remove air bubbles.
- Trim edges: Trim any excess linoleum around the edges.
Here is a quick reference table for common tools and materials needed:
| Tools | Materials |
|---|---|
| Measuring tape | Linoleum sheets |
| Utility knife | Adhesive |
| Trowel | Seam roller |
| Roller | Trim strips |
With these steps and tools, you can install linoleum flooring easily. Enjoy your new, beautiful floor without breaking the bank!
Budget-friendly Hardwood
Dreaming of a beautiful hardwood floor but worried about the cost? Budget-friendly hardwood options allow you to enjoy the elegance of wood without emptying your wallet. By exploring alternative hardwood solutions, you can achieve a stunning look while sticking to a budget.
Engineered Options
Engineered hardwood is a smart choice for those seeking affordability. Unlike traditional hardwood, engineered hardwood consists of a thin veneer of real wood on top of a core made of plywood or high-density fiberboard. This structure makes it more cost-effective and environmentally friendly.
- Cost-Effective: Engineered hardwood is typically less expensive than solid wood.
- Durability: It is designed to withstand changes in humidity and temperature.
- Variety: Available in various finishes and wood types.
Engineered hardwood also offers easy installation. Its tongue-and-groove system allows for a straightforward process, making it an excellent DIY project.
Installation Tips
Installing your own hardwood floor can save you a lot of money. Here are some tips to ensure a smooth installation process:
- Prepare the Subfloor: Ensure the subfloor is clean, dry, and level.
- Acclimate the Wood: Let the wood acclimate to your home’s environment for at least 48 hours.
- Use the Right Tools: Have a saw, tape measure, spacers, and a tapping block ready.
- Follow the Manufacturer’s Guidelines: Always read and follow the specific guidelines provided by the manufacturer.
- Stagger the Planks: Stagger the end joints to create a more natural look.
Follow these tips for a seamless installation and professional finish. With the right approach, your space will look stunning without the high cost.
Consider engineered hardwood for your next flooring project. It’s an affordable, durable, and attractive option that can transform any room.
Diy Floor Staining
Transforming your home’s flooring doesn’t have to break the bank. One affordable and creative way to give your floors a new look is through DIY floor staining. This process can breathe new life into old wooden floors, creating a vibrant, unique finish that can completely change the atmosphere of your room.
Choosing Stains
Before you start, selecting the right stain is crucial. Stains come in various colors and finishes, each offering a different look. Here are some options:
- Oil-Based Stains: These stains penetrate deeply, providing rich color and durability.
- Water-Based Stains: These dry quickly and have a lower odor, making them perfect for indoor projects.
- Gel Stains: These offer a thicker consistency, ideal for vertical surfaces or intricate designs.
| Type of Stain | Drying Time | Best For |
|---|---|---|
| Oil-Based | 8-10 hours | Rich, deep colors |
| Water-Based | 2-4 hours | Quick projects |
| Gel Stain | 6-8 hours | Detailed work |
Application Techniques
Applying the stain correctly ensures an even and beautiful finish. Follow these steps:
- Prepare the Floor: Sand the surface to remove old finishes. Clean the floor thoroughly.
- Test the Stain: Apply a small amount in an inconspicuous area. Ensure the color is right.
- Apply the Stain: Use a brush or cloth. Apply in the direction of the wood grain.
- Wipe Excess Stain: After a few minutes, wipe off excess stain with a clean cloth.
- Let it Dry: Allow the stain to dry completely before applying a second coat or sealer.
With these tips, you can create beautiful, budget-friendly floors. DIY floor staining is a fun and rewarding project that can dramatically improve your home’s look.
Modular Carpet
Transform your space on a budget with modular carpet. It’s versatile, easy to install, and adds a stylish touch to any room. Modular carpet tiles are a perfect DIY flooring solution. They offer endless design possibilities and are cost-effective.
Design Ideas
Modular carpet tiles come in various colors, patterns, and textures. You can mix and match to create unique designs. Here are some design ideas to inspire you:
- Checkerboard Pattern: Use two colors for a classic look.
- Random Mix: Combine different tiles for an eclectic style.
- Stripes: Arrange tiles in rows for a modern feel.
- Border Design: Frame the room with a different color.
Experiment with different layouts. It’s fun and easy to change if you need a new look.
Installation Guide
Installing modular carpet is a simple DIY project. Follow these steps for a successful installation:
- Prepare the Floor: Clean the surface and ensure it’s dry and level.
- Plan the Layout: Lay out the tiles to see how they fit.
- Peel and Stick: Peel off the backing and stick the tiles down.
- Trim as Needed: Use a utility knife to trim the edges.
- Press and Secure: Press down firmly to ensure the tiles adhere well.
Modular carpet tiles are easy to replace. If a tile gets damaged, just swap it out for a new one.
| Step | Description |
|---|---|
| 1 | Clean and prepare the floor. |
| 2 | Plan your tile layout. |
| 3 | Peel off the backing and stick tiles. |
| 4 | Trim tiles for edges and corners. |
| 5 | Press down firmly to secure tiles. |
With these simple steps, you can transform any room in no time. Modular carpet is an affordable and stylish flooring option.
Credit: www.artsandclassy.com
Maintenance Tips
Keeping your new DIY flooring in top shape is crucial. Proper maintenance ensures your floor looks great and lasts longer. Here are some easy tips to help you maintain your flooring without breaking the bank.
Cleaning Hacks
Regular cleaning helps in maintaining the beauty of your floors. Here are some simple cleaning hacks:
- Sweep Daily: Use a soft broom to remove dust and debris.
- Vacuum Weekly: Use a vacuum cleaner with a hard floor attachment.
- Spot Clean: Wipe spills immediately with a damp cloth.
- Use Gentle Cleaners: Opt for pH-neutral cleaners for mopping.
Long-term Care
Long-term care involves more than just cleaning. Follow these tips to ensure the longevity of your flooring:
- Use Rugs: Place rugs in high-traffic areas to minimize wear.
- Avoid Water Damage: Keep water away from flooring to prevent warping.
- Protect From Furniture: Use pads under furniture legs to avoid scratches.
- Check for Damage: Regularly inspect for signs of damage and repair promptly.
By following these simple tips, you can keep your DIY flooring looking new for years. Enjoy your beautiful and budget-friendly space!
Frequently Asked Questions
What Is The Easiest And Cheapest Diy Flooring?
Peel-and-stick vinyl tiles are the easiest and cheapest DIY flooring. They are simple to install and budget-friendly.
How To Change Flooring On A Budget?
Opt for vinyl or laminate flooring. These materials are affordable and easy to install. Shop sales and use discount codes. Consider DIY installation to save labor costs. Reuse or repurpose existing materials where possible.
What Is The Cheapest Alternative To Carpet?
Vinyl flooring is the cheapest alternative to carpet. It’s durable, easy to install, and low-maintenance.
Which Flooring Option Is Most Economical Interior Design?
Laminate flooring is the most economical option. It mimics hardwood, is durable, and easy to install.
What Are Affordable Flooring Options?
Laminate, vinyl, and ceramic tiles are budget-friendly options for DIY flooring projects.
How Can I Install Laminate Flooring?
Start by measuring the area, then cut and lay the planks, clicking them into place.
Is Vinyl Flooring Easy To Install?
Yes, vinyl flooring is simple to install and often comes in peel-and-stick or click-lock formats.
Can I Paint My Old Tiles?
Yes, you can paint old tiles using specialized tile paint and a sealant for durability.
What’s The Cheapest Type Of Flooring?
Peel-and-stick vinyl tiles are among the cheapest flooring options available.
How To Prepare A Floor For New Flooring?
Clean the existing floor, remove any debris, and ensure it’s level before installing new flooring.
Conclusion
Transforming your space on a budget is entirely possible with DIY flooring ideas. Affordable options can create stunning results. Explore different materials and techniques to match your style. Save money while achieving a fresh, new look. Start your DIY flooring project today and enjoy the transformation.